Scifi World Building Project - Untitled
Short brief
For this project artistically I aim to create a cinematic sci-fi environment where the silhouette and materials communicate history: a civilization that has adapted to wreckage, with nature reasserting itself at the edges. Then technically build an environment workflow demonstrating Houdini → Solaris/USD → Karma/MaterialX, plus Nuke compositing, with strong procedural control, lookdev consistency, and scene efficiency.
Key artistic direction & decisions
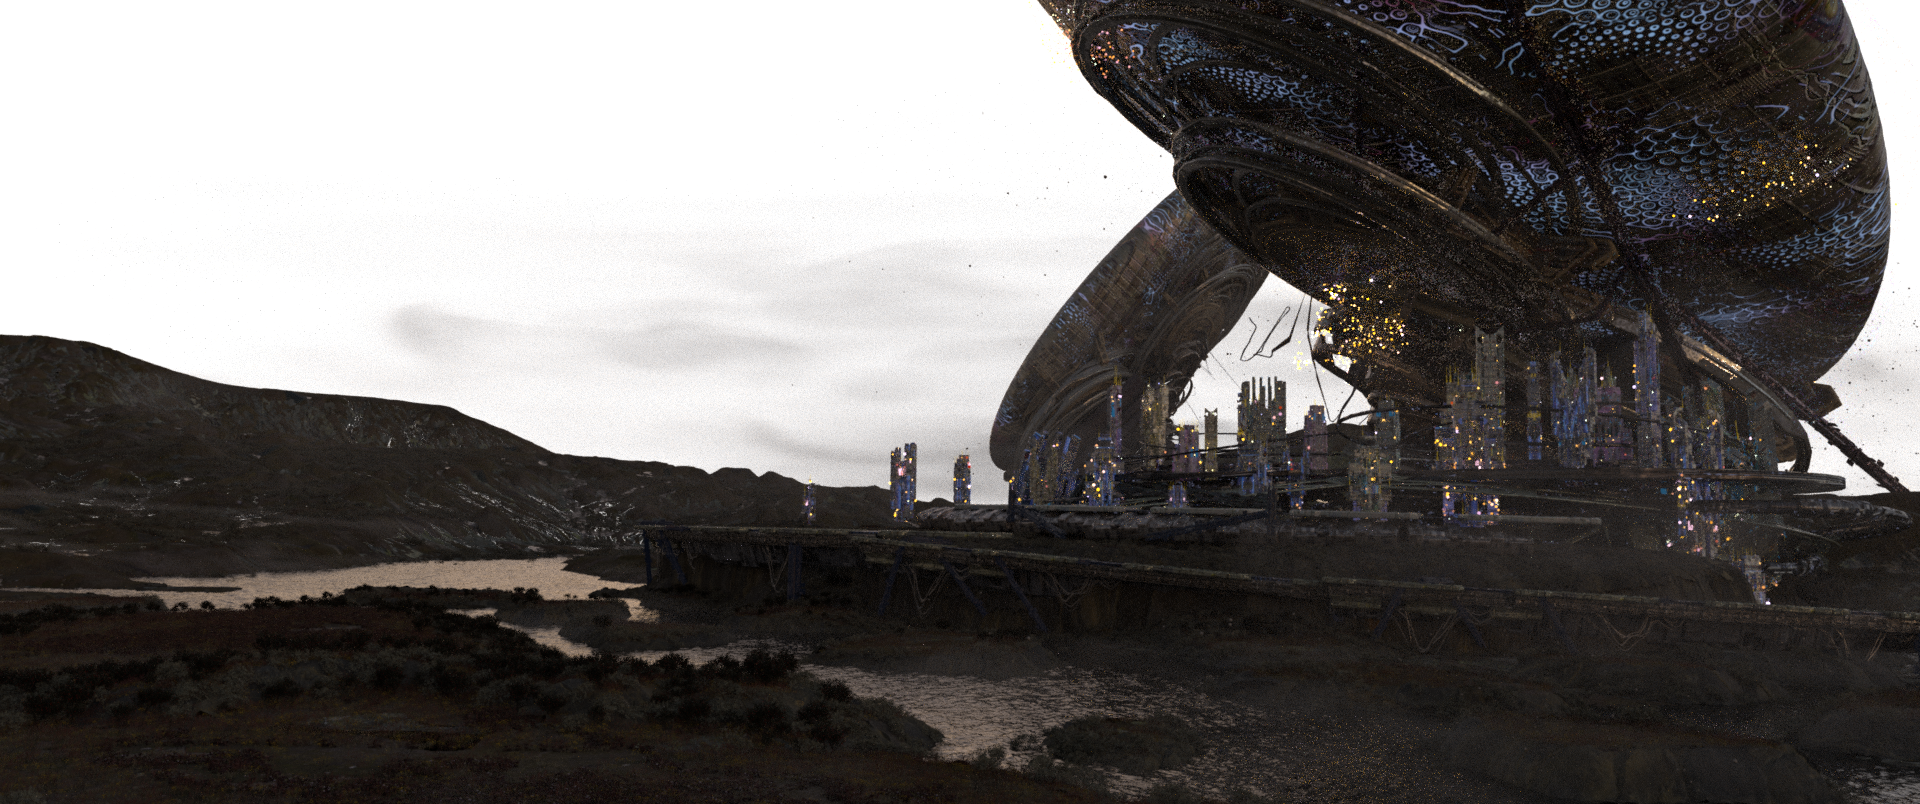
Cinematic referencing Alita: Battle Angel and Ghost in the Shell for grounded sci-fi realism and expanded through architectural languages to create a distinctive silhouette, creating a slightly nostalgic “future-from-the-past” vibe.
Architectural language: Primary forms lean into Zaha Hadid–inspired sweeping curves and fluid rhythm, paired with retro-futurism (1950s/60s space-age optimism—Googie curves, fins, “what-if” futurism) to create a timeless imagined future.
Organic cohesion: Emphasized using reaction-diffusion-like patterns to echo “bio/tech” coexistence—suggesting the city has grown, adapted, or been repurposed over time rather than freshly manufactured.
World logic: The set dressing and terrain transitions aim to sell the idea that humans (or post-humans) built into the wreckage, and nature is actively reclaiming edges, seams, and open structures.
Environment grounding: Terrain/vegetation choices focus on believable natural distribution and weathering cues to keep the shot from feeling like “pure sci-fi kitbash.”
Life + advancement cues: Emissive flickers and drifting particles imply active habitation; the faster flicker cadence hints at high-energy infrastructure and rapid civilization advancement (space-warp era technology).
Workflow & technical decisions
Solaris / USD assembly: Scene built and managed in Solaris (LOPs) using USD-based organization for clean iteration and modular shot building (terrain / city / ship / scatters / FX / lighting).
Procedural scattering + toolmaking: Created clustered scattering with art-directable variation and a custom randomized asset scatter tool to quickly generate believable variety.
Karma + MaterialX procedural lookdev: Developed dynamic, procedural MaterialX shaders for Karma to drive breakup, patterning, and surface variation (including reaction-diffusion–style motifs) while keeping the look cohesive and editable without heavy reliance on baked textures.
Shot lighting: Lighting built in Houdini to support focal readability, scale, and cinematic time-of-day mood.
Nuke finishing: Composited atmospheric depth and separation (haze/air perspective) to enhance scale and custom created crypto matte setup through rgb channels for more flexibility.
Optimization & stability: Full workflow iterated end-to-end with attention to performance under my hardware constraints—scene budgeted and tested for efficient, stable playback and renders.

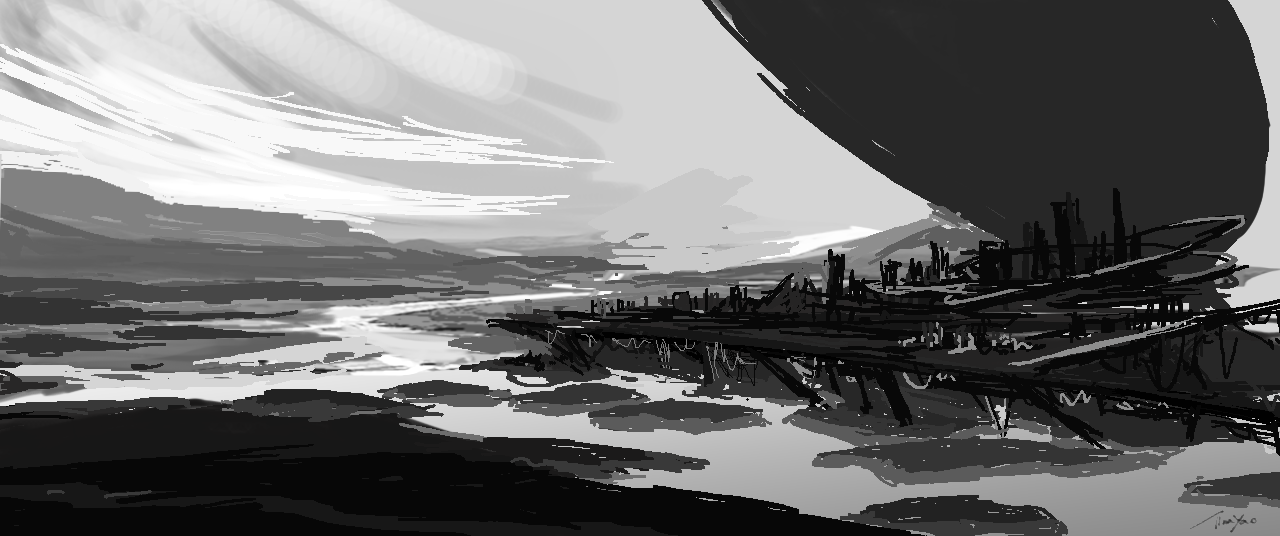
Started with some concept design - drawing & photobash
Project Production Process - Scene 1 - 5

Created a mood board for the direction I would like to go with my concept. To build into a polished environment shot.

This is the first scene I chose to create a shot environment.
I created a rough layout and set up the camera in MAYA.
Then, generated foreground and background terrain, and scattered vegetation and rocks (megascans) in Houdini.
The city was layered with the sci-fi buildings generated by the sci-fi structure generator that I’ve created.
Bigger structures, platforms are constructed by my scifi kitbash and other objects I’ve made for previous projects.
Previous Look Test1 - camera, layout & scatter
Then I’ve put this sequence into NUKE and added a sky and depth haze. Haze did give a lot of information. I realised the back mountain was too close.
The composition appears clustered, so I removed the scatter and iterated on the positioning of the main shapes and terrain.
Test2 - camera, layout & scatter
Referring back to my concept art, I want the composition to be loose and spread out (test1 looks too tight). So, I widened the camera screen size, flattened and regenerated the terrain, then revealed more sci-fi parts.
I want the landscape to be very contrasting, as in the terrain to look very natural - photorealistic, then with the sci-fi city on top.
For a more dramatic reveal, I put the camera half behind a rock. Also, pulled the camera lower so it kind of reveals the background environment. Especially allowing the water to break the landscape and the visual track.


Creating FX - additional elements to …
Mini Comp & Rendering - Nuke, Karma
This was one of the hardest parts of this project for me. Because I lack experience in Nuke & Karma Rendering, and it’s my first time setting up a full mini comp as well as splitting render pass in Karma.
Big limitations in this process was that my computer specs made it really difficult to produce this big scene. Therefore, I had to look at difference way to optimise the process, and choose what I prioritize for the best picture, then take out the rest.
With this in mind, I had to make my materials highly reusable, limit scatters, and adjust the qualities of FX. But even this, for a more reasonably stable and efficient render output, I had to limit the render quality to 1920 x 804 px.
Reducing the image quality then caused problems in light samples low and with result of firefies. But I cannot increase the sample to fix it, otherwise it crashes the render.
Another issue it created was low quality, making the crypto matte pass have pixelated edges which can be a bit obvious in comp masking each layer and adjusting.
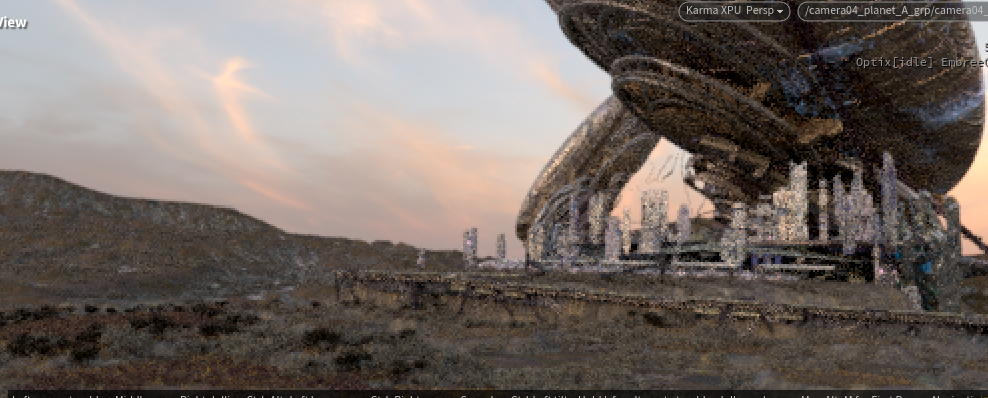
Test3 - camera, layout & scatter, texture, shading, lighting
After test 2, I got feedback that it would be good to make the focus point of the scene (big shape) clearer and oriented. As currently, it makes the perspective look odd. So I’ve turned to ship around and looked at Zaha Hadid’s works. It influenced me to aim for a more fluid structure and also to add in retro-futurist elements that I like.
Then, to show distance, I copied another ship and oriented it around to put in the distance to imply depth.
For the camera, it was recommended to go up and forward and not turn. Unfortunately, I had to look at finishing the shot first and come back to change the camera. But, in the end, I was running out of time to test camera work, so I had to use this take to render.
I chose to use Karma/materialX for lookdev, as I want most of the workflow within Houdini. So, I learned in the project how to write materials for Karma Rendering. Good thing it’s similar to Unreal. So I can transfer logic and create some master materials, dynamic materials, and procedural shading.
It was really nice to create glowing (emissive) materials using reaction-diffusion-like patterns to echo “bio/tech”. I was able to create a shader/mat that can custom-adjust movement, time, patterns, and break up these features with noise so I can have big artistic flexibility and test the looks.
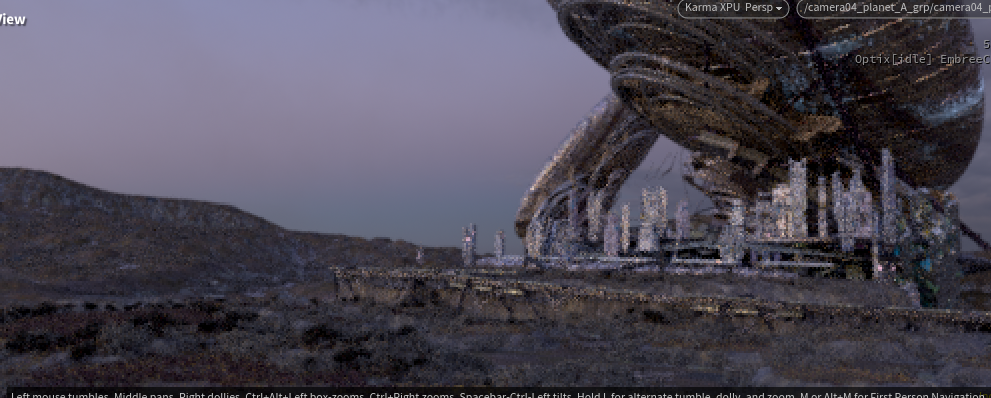
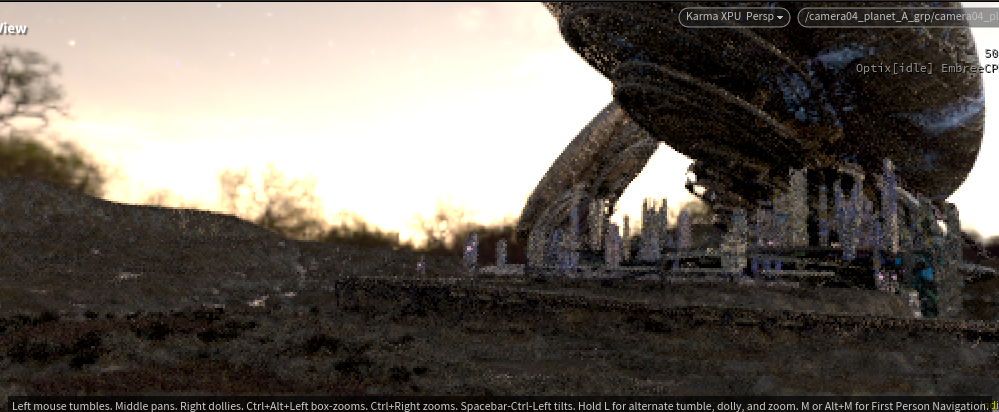
Different HDRI skydome light was used to test which time of day the environment would look best. I turned down my initial thought for a night environment and put this as my second option because a lack of experience in lighting. Night scene was really challenging to set the lights right in Houdini and balance with all the emission I have in the scene.

This is the next scene I want to work on. With the camera set up like this —————>